# 4. Getting Started
The setup process for the robot differs slightly between production robots and robots available under the role Demo. In demo robots, all necessary market data connections are pre-configured, and changing the state of market data connections (Enabled/Disabled) is prohibited. Creating trading connections is also disabled, as these robots are not intended for live trading. When initially setting up such robots, the section Connection Setup should be skipped. Conversely, a production robot created for a client initially has no transactional connections and may lack active required market data connections to exchanges. Therefore, you must first configure connections to receive market data and add transactional connections.
# 4.1. Connection Setup
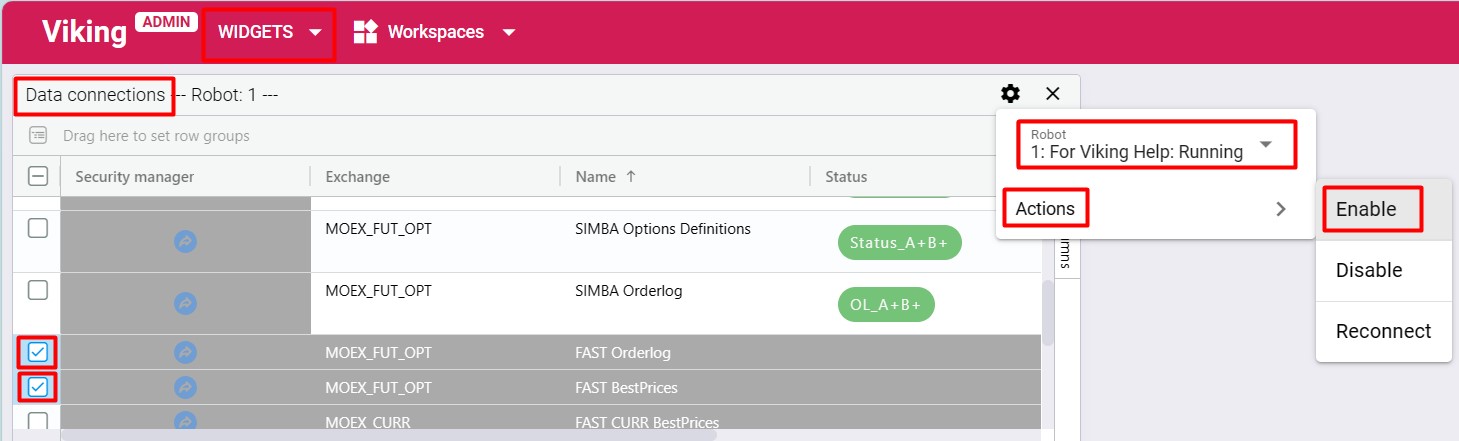
To activate market data connections, select the Data Connections widget, check the required market data connections, click the icon ![]() in the widget’s top panel, select the robot for which the connection is being enabled, and choose the action
in the widget’s top panel, select the robot for which the connection is being enabled, and choose the action Enable.
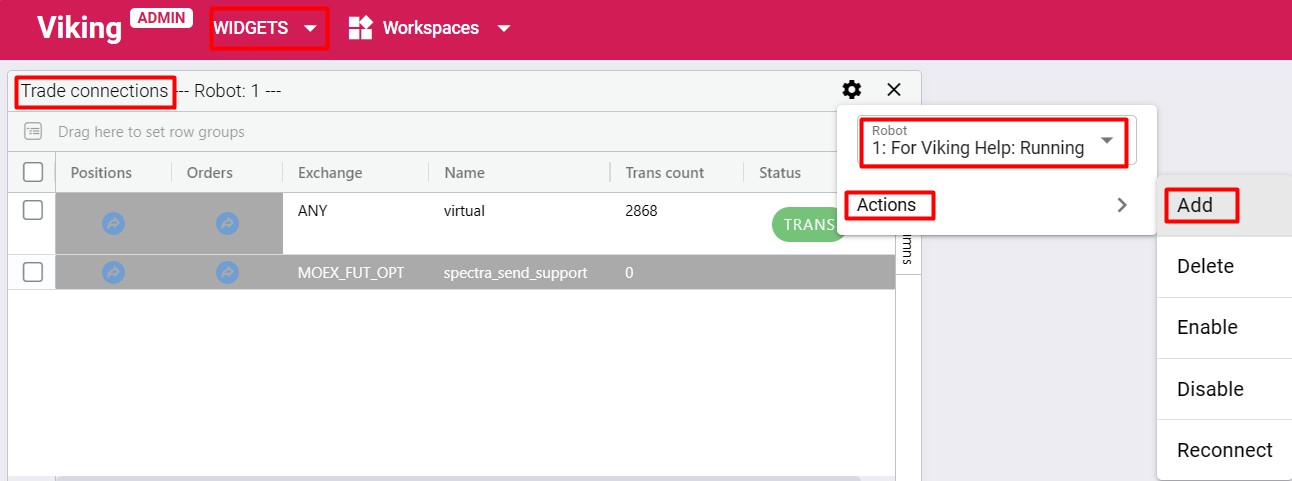
To set up trading connections, select the Trade connections widget, click the icon ![]() in the widget’s top panel, select the robot for which the connection is being added, and choose the action
in the widget’s top panel, select the robot for which the connection is being added, and choose the action Add.
In the window that opens, fill in the connection parameter fields.
After completing all connection parameters, click Add connection.
The Status column in the Trade connections and Data connections widgets displays the status of the corresponding data streams for exchange connections. If all statuses are green, the trading/market data connection is successfully connected to the exchange; otherwise, it is not connected.
Important!
If a trading connection remains disconnected from the exchange during trading hours for an extended period, technical support will notify the client. If, two hours after notification, the connection remains disconnected, technical support reserves the right to deactivate the connection. This is due to the fact that incorrectly configured connections cause undesirable and excessive activity on the exchange. In response, the exchange may block the client's access.
A deactivated trading connection can be edited. Once changes are applied, the trading connection becomes active again, and all statuses should turn green.
# 4.2. Keyboard Shortcuts
Hotkeys are assigned for accessing main widgets and performing portfolio operations. Hotkey combinations are displayed in widget menus and in the Actions menu.
The complete list of hotkeys is available in the user menu (top-right corner) under "Keyboard Shortcuts".
# 4.3. Telegram Bot
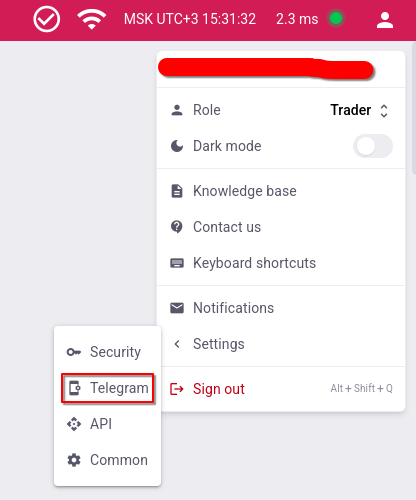
For Telegram notifications, the bot FKVikingBot (opens new window) is used. To connect the Telegram bot, follow these steps:
- Add FKVikingBot (opens new window) to your Telegram account by clicking the link and pressing the "START" button in the chat with the bot;
- Copy or note down the
TELEGRAM IDsent by the bot; - Open the settings menu from the user icon and enter your
TELEGRAM IDthere.
# 4.4. Portfolio Setup
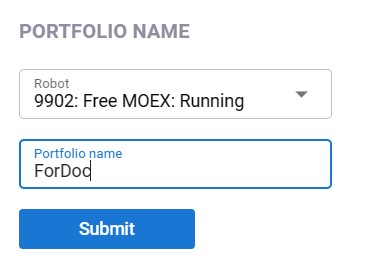
To create a portfolio, select the Portfolios table widget and click ADD.

In the window that opens, use the dropdown list to select the robot in which the new portfolio will be created, enter a name for the portfolio in the Portfolio name field (it is recommended to use descriptive names for easier navigation when managing multiple portfolios; note that the portfolio name cannot be changed later), then click Submit.
To add exchange instruments, go to the AVAILABLE SECURITIES section, select the desired exchange/market from the Exchange dropdown, and click Reload security list from exchanges. Then search for the instrument by its SecKey in the corresponding field. Once the required instrument is found, click the ![]() icon.
icon.
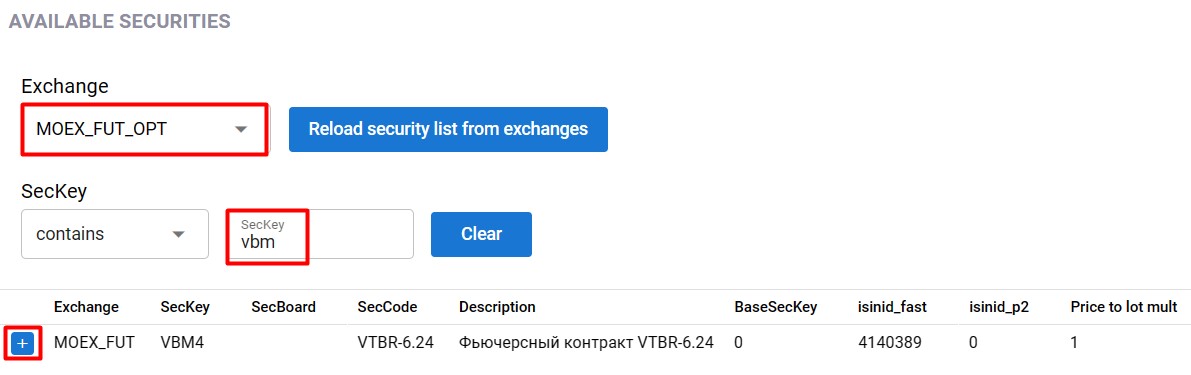
The selected instrument will then appear in the PORTFOLIO SECURITIES section.

Add all required instruments in the same way. After adding all instruments, click Apply.
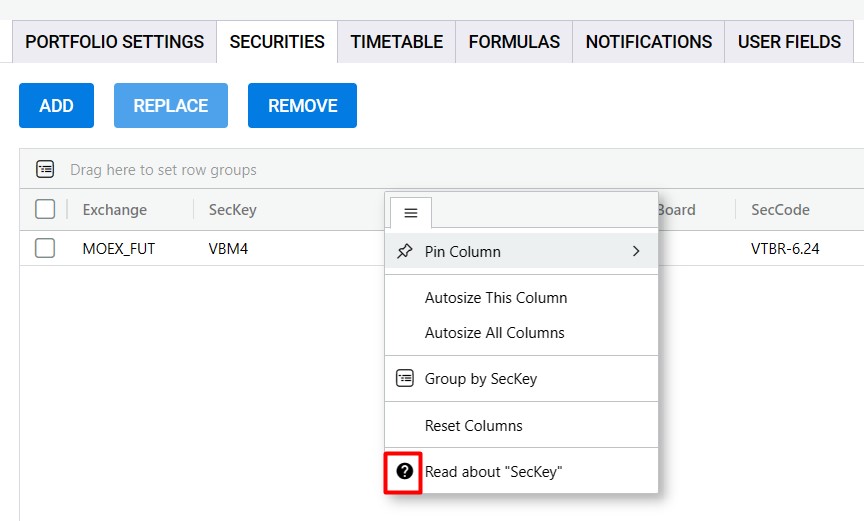
This will open the portfolio settings window. Portfolio parameters are configured on the Portfolio settings tab, and instrument parameters are set on the Securities tab. Detailed parameter descriptions can be viewed by clicking the ![]() icon. For portfolio instrument parameters, the help icon
icon. For portfolio instrument parameters, the help icon ![]() is located within the dropdown list:
is located within the dropdown list:
A crossed-out instrument in the portfolio indicates that the financial instrument’s expiration date is within 3 or fewer trading days (excluding non-trading days). If a portfolio contains at least one such instrument, its name (Name) will also be displayed with a strikethrough.
For real (non-virtual) trading, instead of the value virtual, select the transactional connection you previously created in the Client code field.
For each portfolio, you can configure a trading schedule (on/off times) by navigating to the Timetable tab.
# 4.5. Portfolio Management
Portfolio management commands are located in the ACTIONS dropdown menu of the Portfolios table widget:
Start portfolios
– enables trading for selected portfolios by setting the re_sell and re_buy flags. When a trading schedule is configured using the Timetable parameter, enabling trading via theStart portfolioscommand has no effect.Stop portfolios
- disables trading for selected portfolios by clearing the re_sell and re_buy flags. First-leg orders are canceled; second-leg orders remain on the market and are re-quoted according to the settings of the SL and Timer parameters. When a trading schedule is configured using the Timetable parameter, disabling trading via theStop portfolioscommand has no effect.Hard stop
- stops trading for selected portfolios (clears the re_sell and re_buy flags), attempts to cancel all active orders on both legs, and disables the trading schedule (theUse timetableflag is cleared). This is a complete shutdown of trading for the selected portfolios, after which no order submissions or replacements will occur for any of the portfolio instruments.Important! If certain portfolios have formulas that programmatically control the re_sell and re_buy flags, trading may resume according to those formulas.
Stop formulas
- stops trading for selected portfolios (clears the re_sell and re_buy flags), attempts to cancel all active orders on both legs, and disables the trading schedule (theUse timetableflag is cleared). Additionally, all formula calculations are disabled—i.e., the Custom trade and Extra formulas portfolio flags are cleared, and for each instrument in the portfolio, the Count type and Ratio type fields are set to constant value types. To use formulas again later, they must be manually re-enabled.Reset statuses
- resets internal statuses of all orders for all instruments in the selected portfolios. There are situations when, for some reason, the exchange does not send an update about an order or sends it in a format not compliant with exchange documentation and thus unsupported by the robot. For example, the robot submits an order, the order is placed, the robot sends a cancellation request, the exchange cancels the order, but does not send confirmation of cancellation. In this case, the actual order status on the exchange and the internal status in the robot diverge, and because the robot is waiting for a response, the order remains stuck in the "canceling" status. This button should be used ONLY IN EXTREME CASES, when trading is disabled for the portfolio and you are certain there are no active orders for that portfolio. Otherwise, the robot may lose track of active orders, leading to incorrect financial instrument positions in the robot.Important! Note that, unlike double-clicking the Sell status and Buy status fields in the
Portfolios tablewidget, using this button resets internal statuses for all orders on both legs of the portfolio.Important! After using this button, ensure there are no active orders on the exchange and that exchange positions match those in the robot.
To market
- forcibly aligns positions of the selected portfolios. The behavior is identical to using the To market clicker on the selected portfolios.To0
- restricts trading for selected portfolios, allowing trading only in the direction of position closing. Sets the To0 flag for the selected portfolios.Group TradingDays
- allows setting trading days for selected portfolios. Behavior is similar to setting trading days in each portfolio’s settings on the Timetable tab, with the difference that only the entered changes are applied. For example, if two portfolios have different trading day lists—one with Monday, Tuesday, Friday, and another with Monday, Tuesday, Friday, Saturday, Sunday—you can add Thursday to both lists via this widget, but the lists will not become identical.Important! This widget modifies only the list of trading days; the time intervals defining trading hours and the Timetable checkbox itself remain unchanged.
Group Timetable
- allows setting trading intervals for selected portfolios or copying trading intervals from an existing timetable of another portfolio. The behavior is similar to setting trading intervals in each portfolio’s settings on the Timetable tab, with the added ability to copy intervals from another portfolio.
Remove
- deletes the selected portfolios.Clone portfolio
- creates a clone of the selected portfolio. The button clones the selected portfolio in the robot that contains the original portfolio being cloned. To transfer portfolios between different robots, we recommend you use Export portfolio \ Import portfolio.Important! When cloning a portfolio, values that exist only as variables within formula code—including indicators and their states—are not copied.
Disable portfolio \ Enable portfolio
- excludes selected portfolios from calculations or returns them to normal operation by clearing or setting the Disabled flag. Do not confuse this with enabling/disabling trading for a portfolio. UsingDisableallows excluding an unused portfolio from calculations. Market data and order books for all its instruments will stop updating (unless those instruments are used in other portfolios). Editing portfolio parameters is not possible while inDisabledstatus. Be careful! Before disabling a portfolio, ensure trading is stopped, no orders are active or being submitted, and that the portfolio’s fields and instruments are not used in formulas of other portfolios. Also note that re-enabling a portfolio may trigger the reopening of the trading order book.Export portfolio \ Import portfolio
- exports selected portfolios from the robot to your computer as.inifiles, or imports portfolios into the robot.Important! The portfolio settings file, in addition to user-defined parameters, also contains exchange information about trading instruments. Therefore, when editing this file manually (via a text editor), any information not related to the user-defined parameters must remain unchanged.
# 4.6. Charts
The widgets are built on the TradingView chart platform.
Clicking the ![]() icon in the
icon in the Chart column of the Portfolios table widget will open one of two widgets - Portfolios historical chart or Portfolios realtime chart - depending on whether parameter history recording is enabled for the portfolio.
RealTime mode for portfolios without parameter history recording
The chart opens with pre-set indicators: portfolio parameters Sell, Buy, Lim_sell and Lim_buy. It is not possible to change or add other indicators. The chart time frame cannot be modified. Chart data begins rendering from the moment the widget is opened. Chart data is not preserved after page reload.
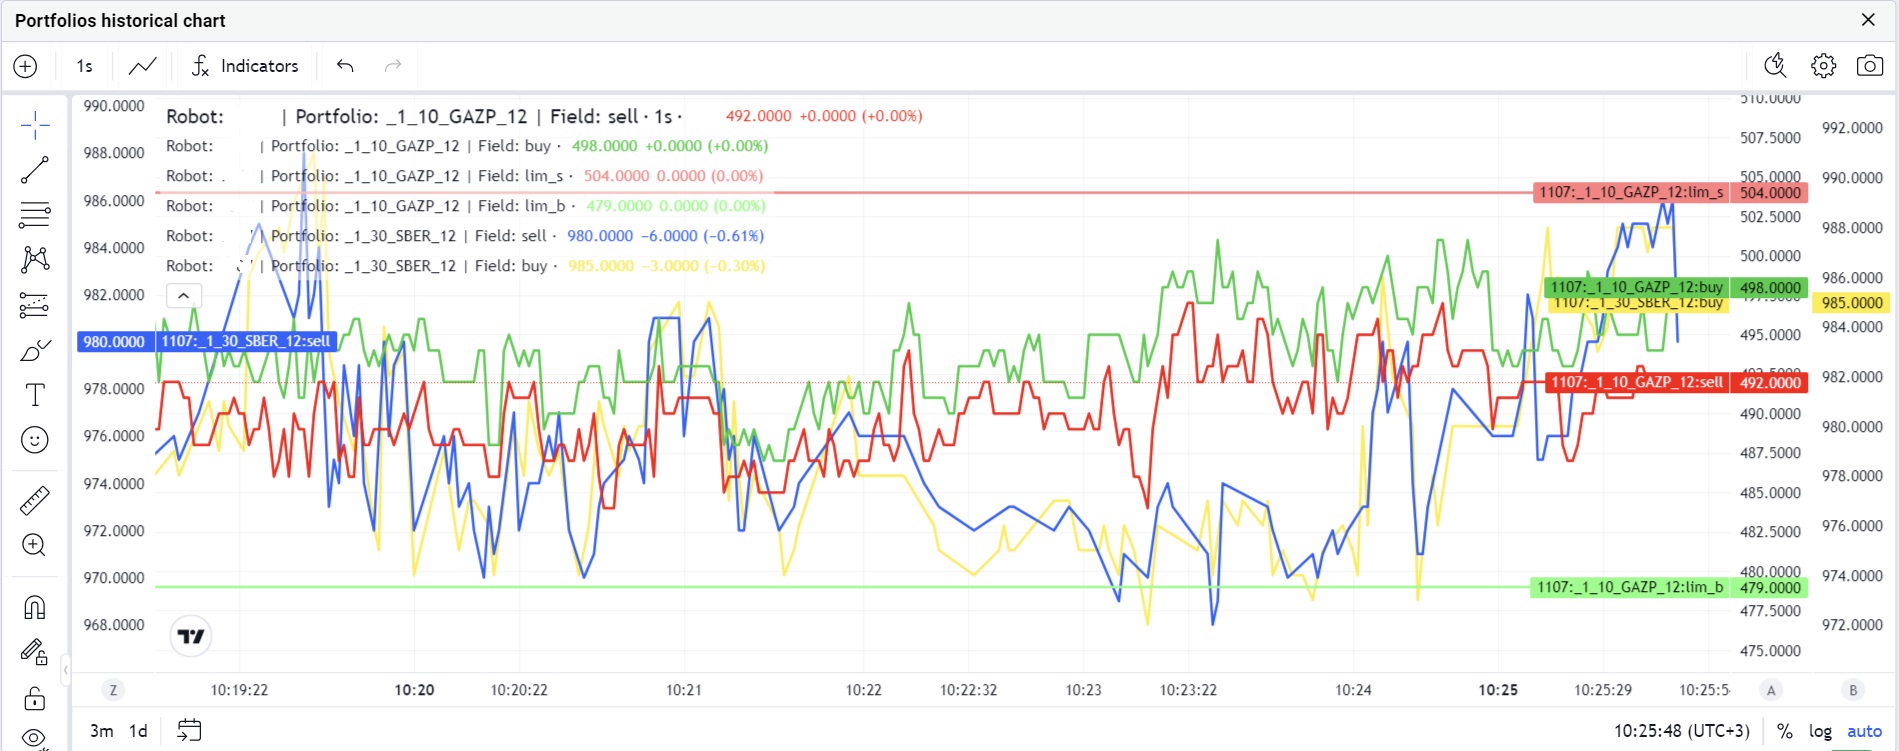
Historical mode for portfolios with parameter history recording enabled
The chart opens with the same default indicators: Sell, Buy, Lim_sell and Lim_buy. These parameters can be removed or replaced. History recording is controlled by the user via the Save history setting in the schedule on the Timetable tab in portfolio settings. The chart displays data for the selected period, and historical data is loaded progressively when scrolling rightward, back to the point when history recording began. For MOEX markets, it is recommended to follow the market schedule to avoid informational gaps in the history. There is a limit on the number of portfolios for which history recording is available. By default, this limit is 3 portfolios. To request an increase, please contact technical support. The chart supports multiple time frames, selectable in the upper-left corner. Selected indicators can be removed, and additional ones can be added from the dropdown list containing any user portfolio’s available parameters. Additional instruments can be added using the "+" button in the upper-left corner. The full list of available fields can be viewed in the Field field.
.b87cb3e1.jpg)
The main instrument is always present on the chart and cannot be deleted, but it can be changed via the instrument selection menu on the Main tab.
A significant portion of TradingView's toolset is available for use on the charts.
It is possible to display multiple portfolios (with history recording enabled) on a single chart. Maximum history duration is 3 months; beyond that, older data is gradually overwritten starting from the earliest entries. Up to 10 chart widgets can be opened simultaneously.
Customized chart layouts are preserved as long as the chart widget remains open, and also persist across page reloads and workspace switches. Note that chart data represents periodic snapshots of real-time parameter values used by the robot. Data is updated approximately 3 times per second; therefore, if parameter values change multiple times within 0.3 seconds, only the most recent value will be displayed on the chart.
# 4.7. Two-Factor Authentication
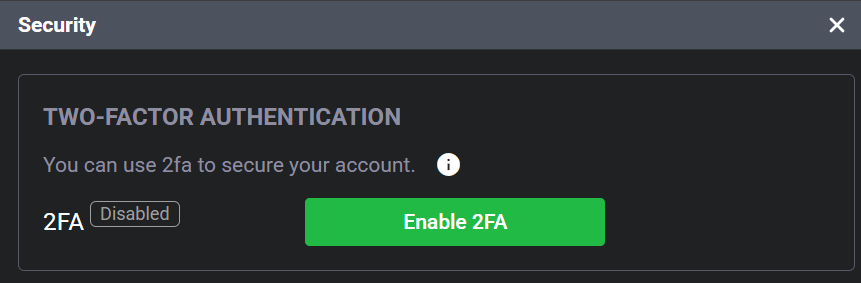
To enhance user account security on the platform, two-factor authentication (2FA) is implemented. By default, 2FA is disabled.
Enabling 2FA:
Install an authenticator app: Install a mobile authenticator app that supports the Time-based One-time Password (TOTP) protocol, such as Google Authenticator, Authy, or Microsoft Authenticator.
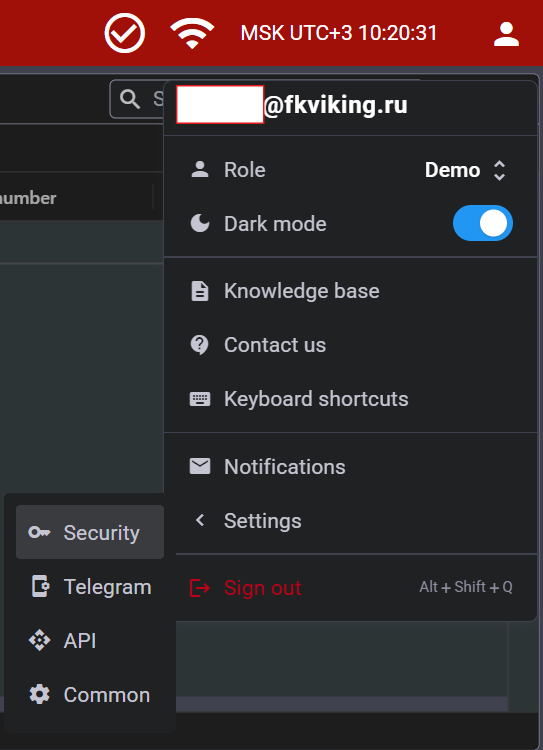
Platform setup: Log in to your account, go to the user menu, then navigate to Settings and proceed to Security. Click the Enable 2FA button.
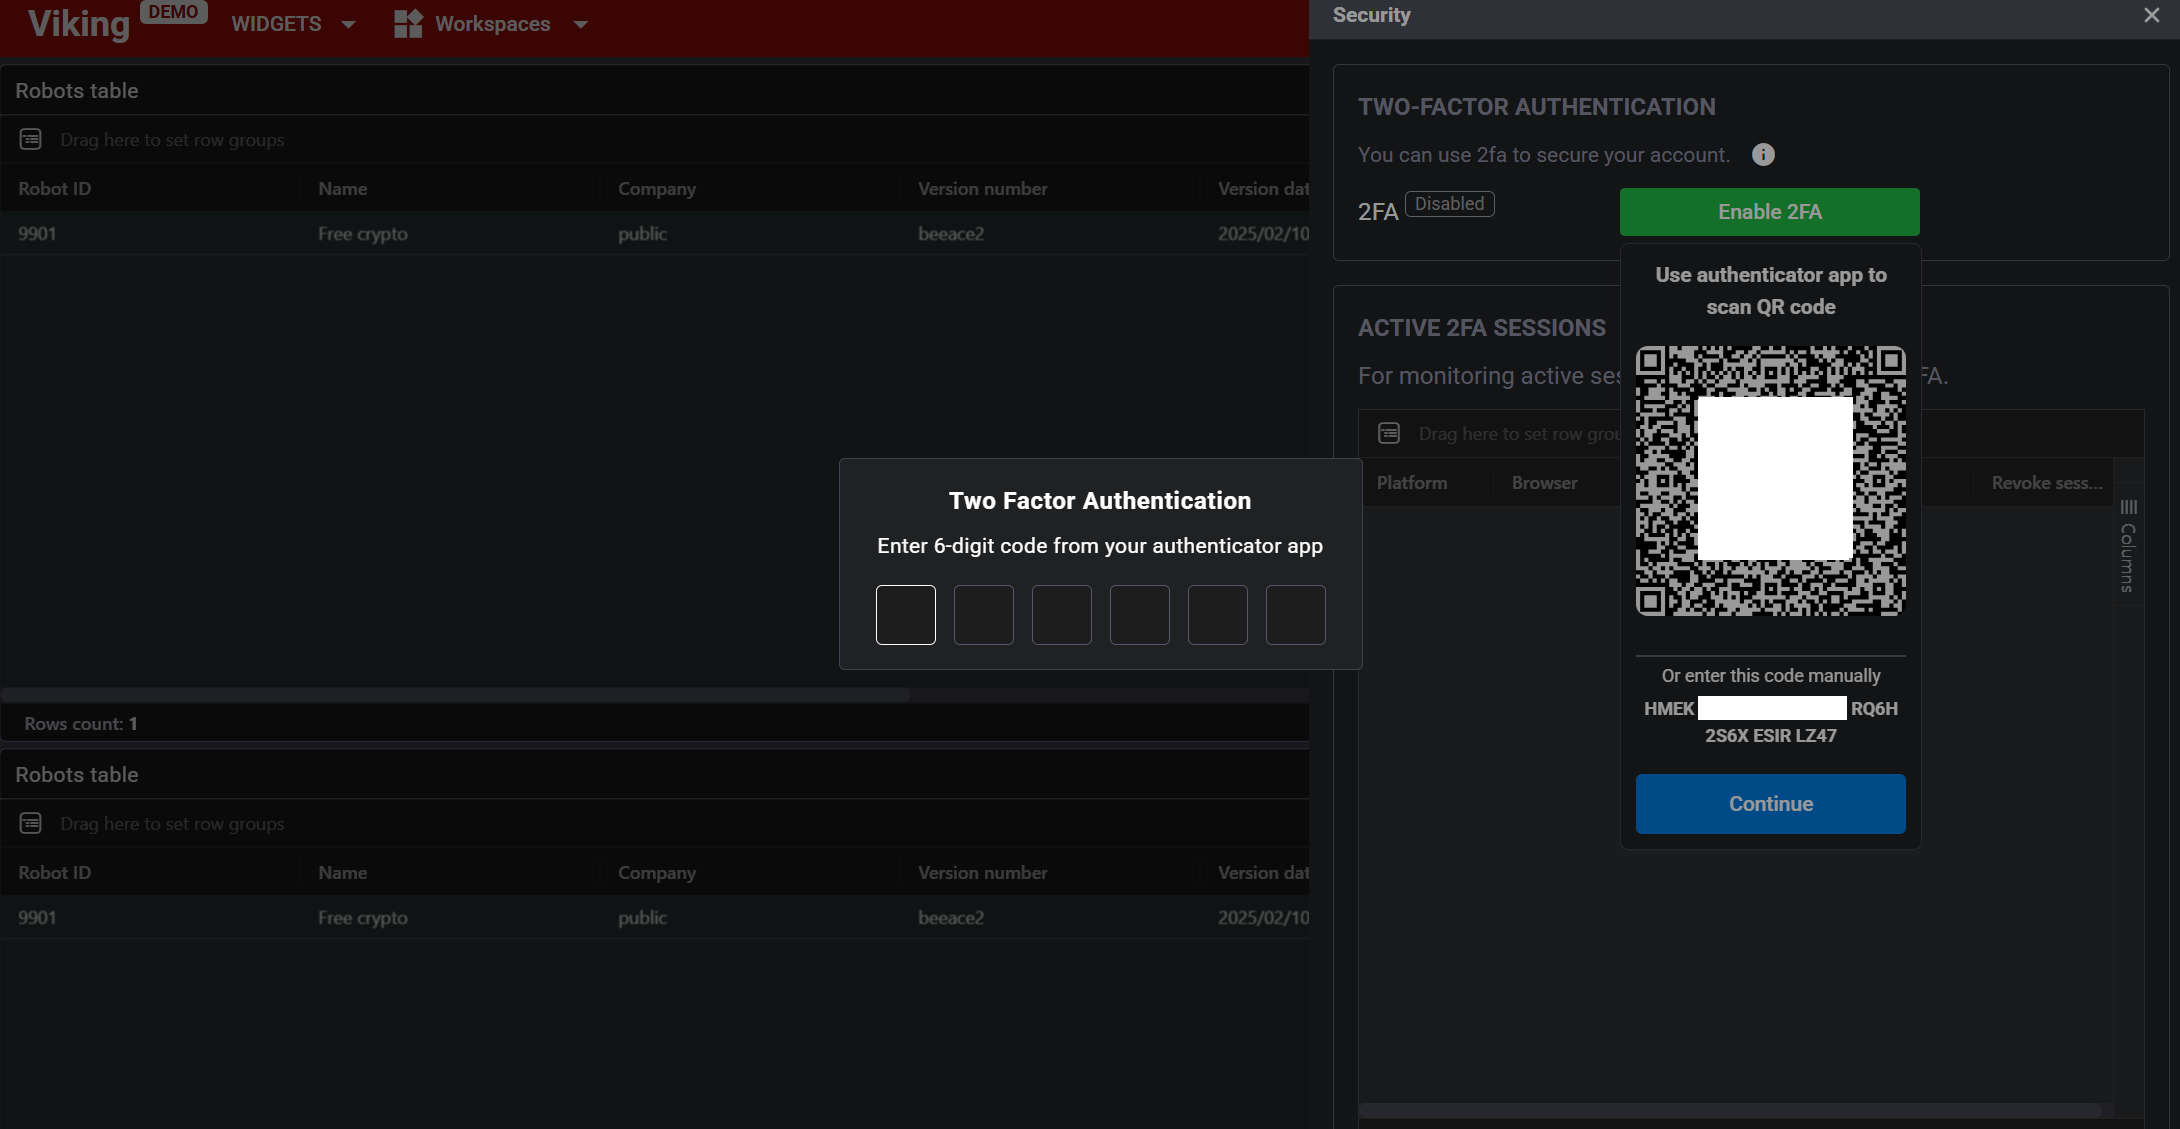
Scan the QR code: Use the installed app to scan the QR code displayed on the screen, then enter the confirmation code generated by the app.
2FA Usage Notes:
*Device time: Ensure that the time on your device is synchronized with accurate time, as this is critical for TOTP to function correctly.
Device limit: In the Security section, you can view the list of authorized devices. Up to 20 devices can be registered simultaneously.

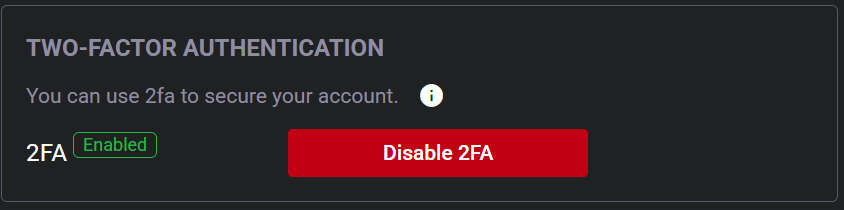
Disabling 2FA: To deactivate 2FA, click the Disable 2FA button in the Security section.
Additional Information:
Code validity period: You have 120 seconds to enter the 2FA code; after this time, the connection will be closed.
Re-authentication interval: 2FA confirmation is required every 14 days.
Lockout on failed attempts: Entering an incorrect 2FA code three times in a row will block further attempts from that device for 10 minutes.
Code uniqueness: The same 2FA code cannot be used more than once consecutively. If a code has already been used, wait for the next one to be generated before proceeding.
Activation window: When enabling 2FA, the secret key is valid for 10 minutes. If the setup is not confirmed within this time, the process must be repeated.
Session termination: Upon 2FA activation, all existing user sessions will be terminated.
Logging out: To "forget" 2FA for a specific device, log out of your account.
Recovery access: If you lose access to your 2FA method and cannot log in, contact technical support. After identity verification, 2FA will be reset, allowing you to reconfigure it.
It is strongly recommended to set up two-factor authentication to enhance the security of your account.
# 4.8. IP address whitelist.
For greater security, you can restrict access to the platform from your login by specifying the IP addresses from which access is permitted. Logging in as your user from a different IP address will be impossible.
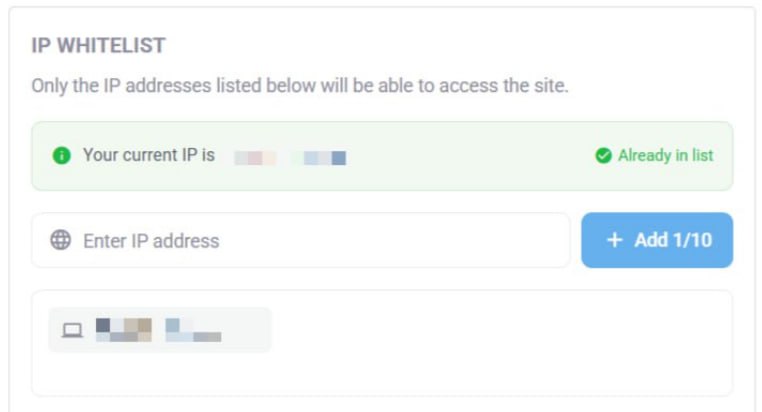
This setting is located in the user menu, then the Settings section, and then Security.
You must define a list of IP addresses from which access is required, then enter them in the Enter IP address field and click Add.
When the menu opens, the IP address currently connected will be detected and you will be prompted to immediately add it to the list.
If the list is empty, access is permitted from any IP address. If at least one IP address is on the list, access is allowed only from that IP address.
The list can contain up to 10 IP addresses.
After adding all the required IP addresses, save the changes by clicking the Apply Changes button.
When applying an address list, all connections from a user not on the white list will be closed.